Making spinach pizza dough, as featured in a previous blog, was a fun and tasty recipe idea. But I still had some spinach left over. So I decided to add it to my Chicken Rollatini recipe, and it was delicious!
Chicken Rollatini was one of the first dishes I learned how to make back in my teenage days on Long Island, working at a local Italian restaurant called Pizza City East. (The original Pizza City was in Ozone Park, Queens.) It was a simple dish: a chicken breast rolled up with prosciutto and mozzarella, and baked in a mushroom cream sauce. My version these days substitutes ham for the prosciutto, provolone for the mozzarella, and an Alfredo-like sauce instead of the mushroom cream sauce.
This time I added the frozen spinach to the mix, and I have to say, I think I’ll always cook it this way from now on.
4 chicken breasts cut lengthwise to make 8 thin breasts, about 2 pounds
8 slices sliced ham
8 slices of provolone cheese
6 oz. frozen spinach, finely chopped
Place the chopped spinach in a bowl and add granulated garlic and oregano to taste. Set it aside.
Remove the chicken tender portion of the chicken breasts and set those aside for another day.
I usually don’t like to pound out my chicken breasts. I like the texture of “real meat.” So I take a large breast, and slice it lengthwise to make 2 thinner breasts. I lay the breast down on the cutting board, add a slice of ham, then a slice of provolone, (and this time, some of the spinach mix), and carefully roll it up, securing it with toothpicks, if necessary. Place the rollatinis on a baking sheet. Set aside, preferably in the fridge, until ready to cook.
The addition of spinach, this time, to the old recipe.
Combine these ingredients in a bowl. Set it aside.
2 carrots
2 celery stalks
1/2 medium onion
Olive oil
Peel and chop the carrots into quarters. Peel and chop the onion in half. Chop the celery into quarters as well. Place all the vegetables on a sheet pan and drizzle olive oil over the top, tossing them in the oil. Roast the vegetables in a 400° oven until caramelized, and the carrots are fork-tender, about 20 minutes. Remove the sheet pan from the oven and let the vegetables cool. Once the veggies have cooled, chop them finely with a knife or food processor. Set them aside.
3 cups your favorite rice, cooked
Cook the rice according to package directions. Once the rice is cooked, mix it with the chopped carrots, parsnips, celery and onion. Set it aside.
1 cup cream or half-and-half
3 tablespoons butter
1/2 cup freshly grated Parmigiano Reggiano
salt and pepper
For the Alfredo-like sauce, heat a saucepan over medium heat, melting the butter and then adding the cream or half-and-half. Once it’s warmed through, add the cheese and whisk until it has melted and the sauce is smooth. Season with salt and pepper. Set it aside, to re-warm later.
Take the pan of rollatinis out of the fridge to warm to room temperature, and reduce the heat of the oven to 350°.
Drizzle a little olive oil over the top of the rollatinis and rub it in. Sprinkle the breadcrumb mixture over the top, pressing them into the chicken, and bake them for 30-45 minutes, until the chicken has cooked through.
To serve, remove the chicken rollatinis from the pan and plate them on a bed of arugula (optional) with the rice on the side. (Be sure to remove the toothpicks.) Serve with the sauce.
I like a margarita that has a few, simple ingredients…and no sour mix. This is the one that hits the spot for me. My friends affectionately call it an “Algarita.”
3 oz. Patron silver tequila
1 oz. Cointreau orange liqueur
4 oz. pineapple juice
juice of 1/2 a fresh lime, plus more for garnish
Place ice in a cocktail shaker and add Patron, Cointreau, pineapple juice and a good squeeze of lime juice from 1/2 a lime. Stir well, then pour it into a margarita glass (salt rim optional) and garnish with a lime wedge.
Patron silver always seems to be available, but use your favorite tequila. I prefer Cointreau over Grande Marnier, but, again, that’s a personal preference. Sometimes I skip the orange liqueur altogether.
And my buddy, Dr. Chezwick, goes half and half with pineapple and orange juice in his trademarked “Chezarita.” Go with what you love!
The 150th running of the Kentucky Derby is Saturday, May 4th, 2024, and although I’m not a big horse racing fan, I am a huge fan of the official drink: the Mint Julep!
The Mint Julep is such a perfect, classic and historic bourbon drink, it seems silly to wait until Derby Day to have one. Of course, as any aficionado of spirits will tell you, there are as many right ways as wrong ways of making one.
The first step in my Mint Julep is making the simple syrup. Learning from one of my old radio buddies, my pal Rick O’B, I infuse mint into my simple syrup to take my cocktail to the next level. I use the standard ratio of 1 cup of clean, filtered water to 1 cup of sugar. I place the sugar and water in a saucepan and heat until just boiling. I’ve found that it needs to reach this stage for the sugar to really dissolve.
Waiting for the sugar to dissolve.
As soon as it starts to boil, I remove the saucepan from the heat, and throw in a handful of freshly picked mint leaves, stirring to make sure the mint gets in there, and then I leave the saucepan to cool to room temperature.
Once it’s at room temp, I strain the simple syrup into a bottle with a tight sealing lid, and place it in the refrigerator to cool. It will keep for about a week.
An equally important ingredient for a perfect Mint Julep is the ice: specifically, crushed ice from clean, filtered water. Don’t even think of using tap water for any cocktail much less this one. Why ruin an expensive bottle of bourbon by going cheap on the ice? I make my own ice cubes, then put them in an untreated canvas ice bag and bash them with a mallet to the perfect crushed size. But if you don’t want to go through all the trouble, just buy a bag of good ice. Untreated canvas bags for crushing ice can be purchased online from bar supply companies for about $30. I got an untreated canvas tool bag (the exact same shape and size) at Home Depot for 3 bucks.
Da bag.
The next step is a little tougher: which bourbon to choose. The explosion of choices on the bourbon market has made it all but impossible for the average imbiber to know which bourbon is best for their tastes. If you’re a beginner, I suggest you go to a trusted bartender and explain that you’re new to the bourbon world, and could you have the tiniest of tastes and sniffs of what he’s got at his bar. Chances are, you’ll get a sampling of some of the better known brands: Maker’s Mark, Woodford Reserve, perhaps Buffalo Trace or Bulleit, and the standard Jim Beam. This is a very good start. (Also, hinting to wife and friends that “I’m trying new bourbons” around your birthday or Father’s Day inevitably gets you a few bottles as well!)
My go-to bourbon for Mint Juleps used to be Eagle Rare 10-year-old when it was around $32.99 a bottle. Now it’s up to $80! My latest go-to bourbon is 1792 Small Batch. At $29, it’s almost unbelievable, like someone made a mistake in the stock room! Very tasty on its own and great for mixing. Others that work well and are around the same price range include Buffalo Trace, and Larceny.
Finally, a Mint Julep needs a metal–not glass– Julep cup. Made of pewter or aluminum, it frosts on the outside as you stir your drink, keeping your beverage ice-cold on even the hottest of days.
3 oz. bourbon 1 oz. mint-infused simple syrup crushed ice Julep cup Fresh mint for garnish
Crush the ice and pack it into the Julep cup, even letting it dome slightly over the top. Don’t worry…the alcohol will melt it.
I like to add 1.5 ounces of bourbon, then the ounce of simple syrup, another 1.5 ounces of bourbon on top, and then a quick squirt of simple syrup to top it off. Break off a few mint leaves from the stem and push them into the ice. A beautiful layer of frost will form on the outside of the cup. Add more ice, if necessary, and garnish with a sprig of mint.
A nice selection of bourbons. This is an old photo: that Pappy Van Winkle is long gone…but I saved the bottle!
I’ve made spinach pasta before, so I figured it couldn’t be that hard to make spinach pizza dough. It’s pretty much the same procedure: I combined about 3 cups of 00 flour (I like King Arthur) with a tablespoon of Kosher salt in my standing mixer.
In a Pyrex measuring cup, I poured in a cup of water and put it in the microwave for 30 seconds to bring the temperature to about 100 degrees. (Over 110 degrees will kill the yeast.) I added a tablespoon of dry active yeast to the water, and then a bit of sugar, mixing it well, and I let it sit for about 10 minutes until it started foaming up.
Meanwhile, I thawed a package of frozen spinach and removed 6 ounces’ worth. I squeezed as much water out of it as I could, reducing the weight to about 4 ounces. I chopped the spinach up well, then mixed it with the flour in the mixing bowl. I added the water with the yeast, adding some of the spinach water if more water was needed.
My old school KitchenAid. Still kickin’ butt!
Once the dough ball pulled from the sides of the mixing bowl, I took it out and continued to knead it by hand until the ball was smooth.
I added a little olive oil to the mixing bowl, and placed the dough ball back in it, covering it with plastic to rise over several hours.
After a few hours, I punched the dough down and let it rise again.
Rising in a warm place in the kitchen.
A couple more hours, and I rolled the dough into 2 smalls balls and a small baguette. (Had we planned on making a deep dish pan pizza, I would’ve used the whole dough ball. But we went for thin crust instead.)
I placed my pizza stone in my cold oven, and then preheated my oven to 500 degrees. (I use a cast iron plate, which goes by the brand name Pizzori. It gets really hot and makes the crust nice and crispy.)
Rubbing some corn meal on my pizza peel, I placed the baguette on it and slid it into the oven, baking it for about 20 minutes until it was golden brown.
I let the oven warm up again after removing the baguette, and starting prepping my pizzas.
The first pizza was a white pizza, meaning I made a bechamel sauce for it: a simple combination of 2 tablespoons melted butter in a saucepan with 2 tablespoons of flour, mixing to make a roux. I then added some milk, and a little granulated garlic and oregano. I let it thicken and set it aside.
I stretched the spinach dough out on the pizza peel, and spread the bechamel sauce on it. I followed this with slices of mozzarella, and bits of home-cured guanciale that I had chopped and fried in a pan. In the oven it went, and once it came out, I added shaved Parmigiano Reggiano and some microgreens.
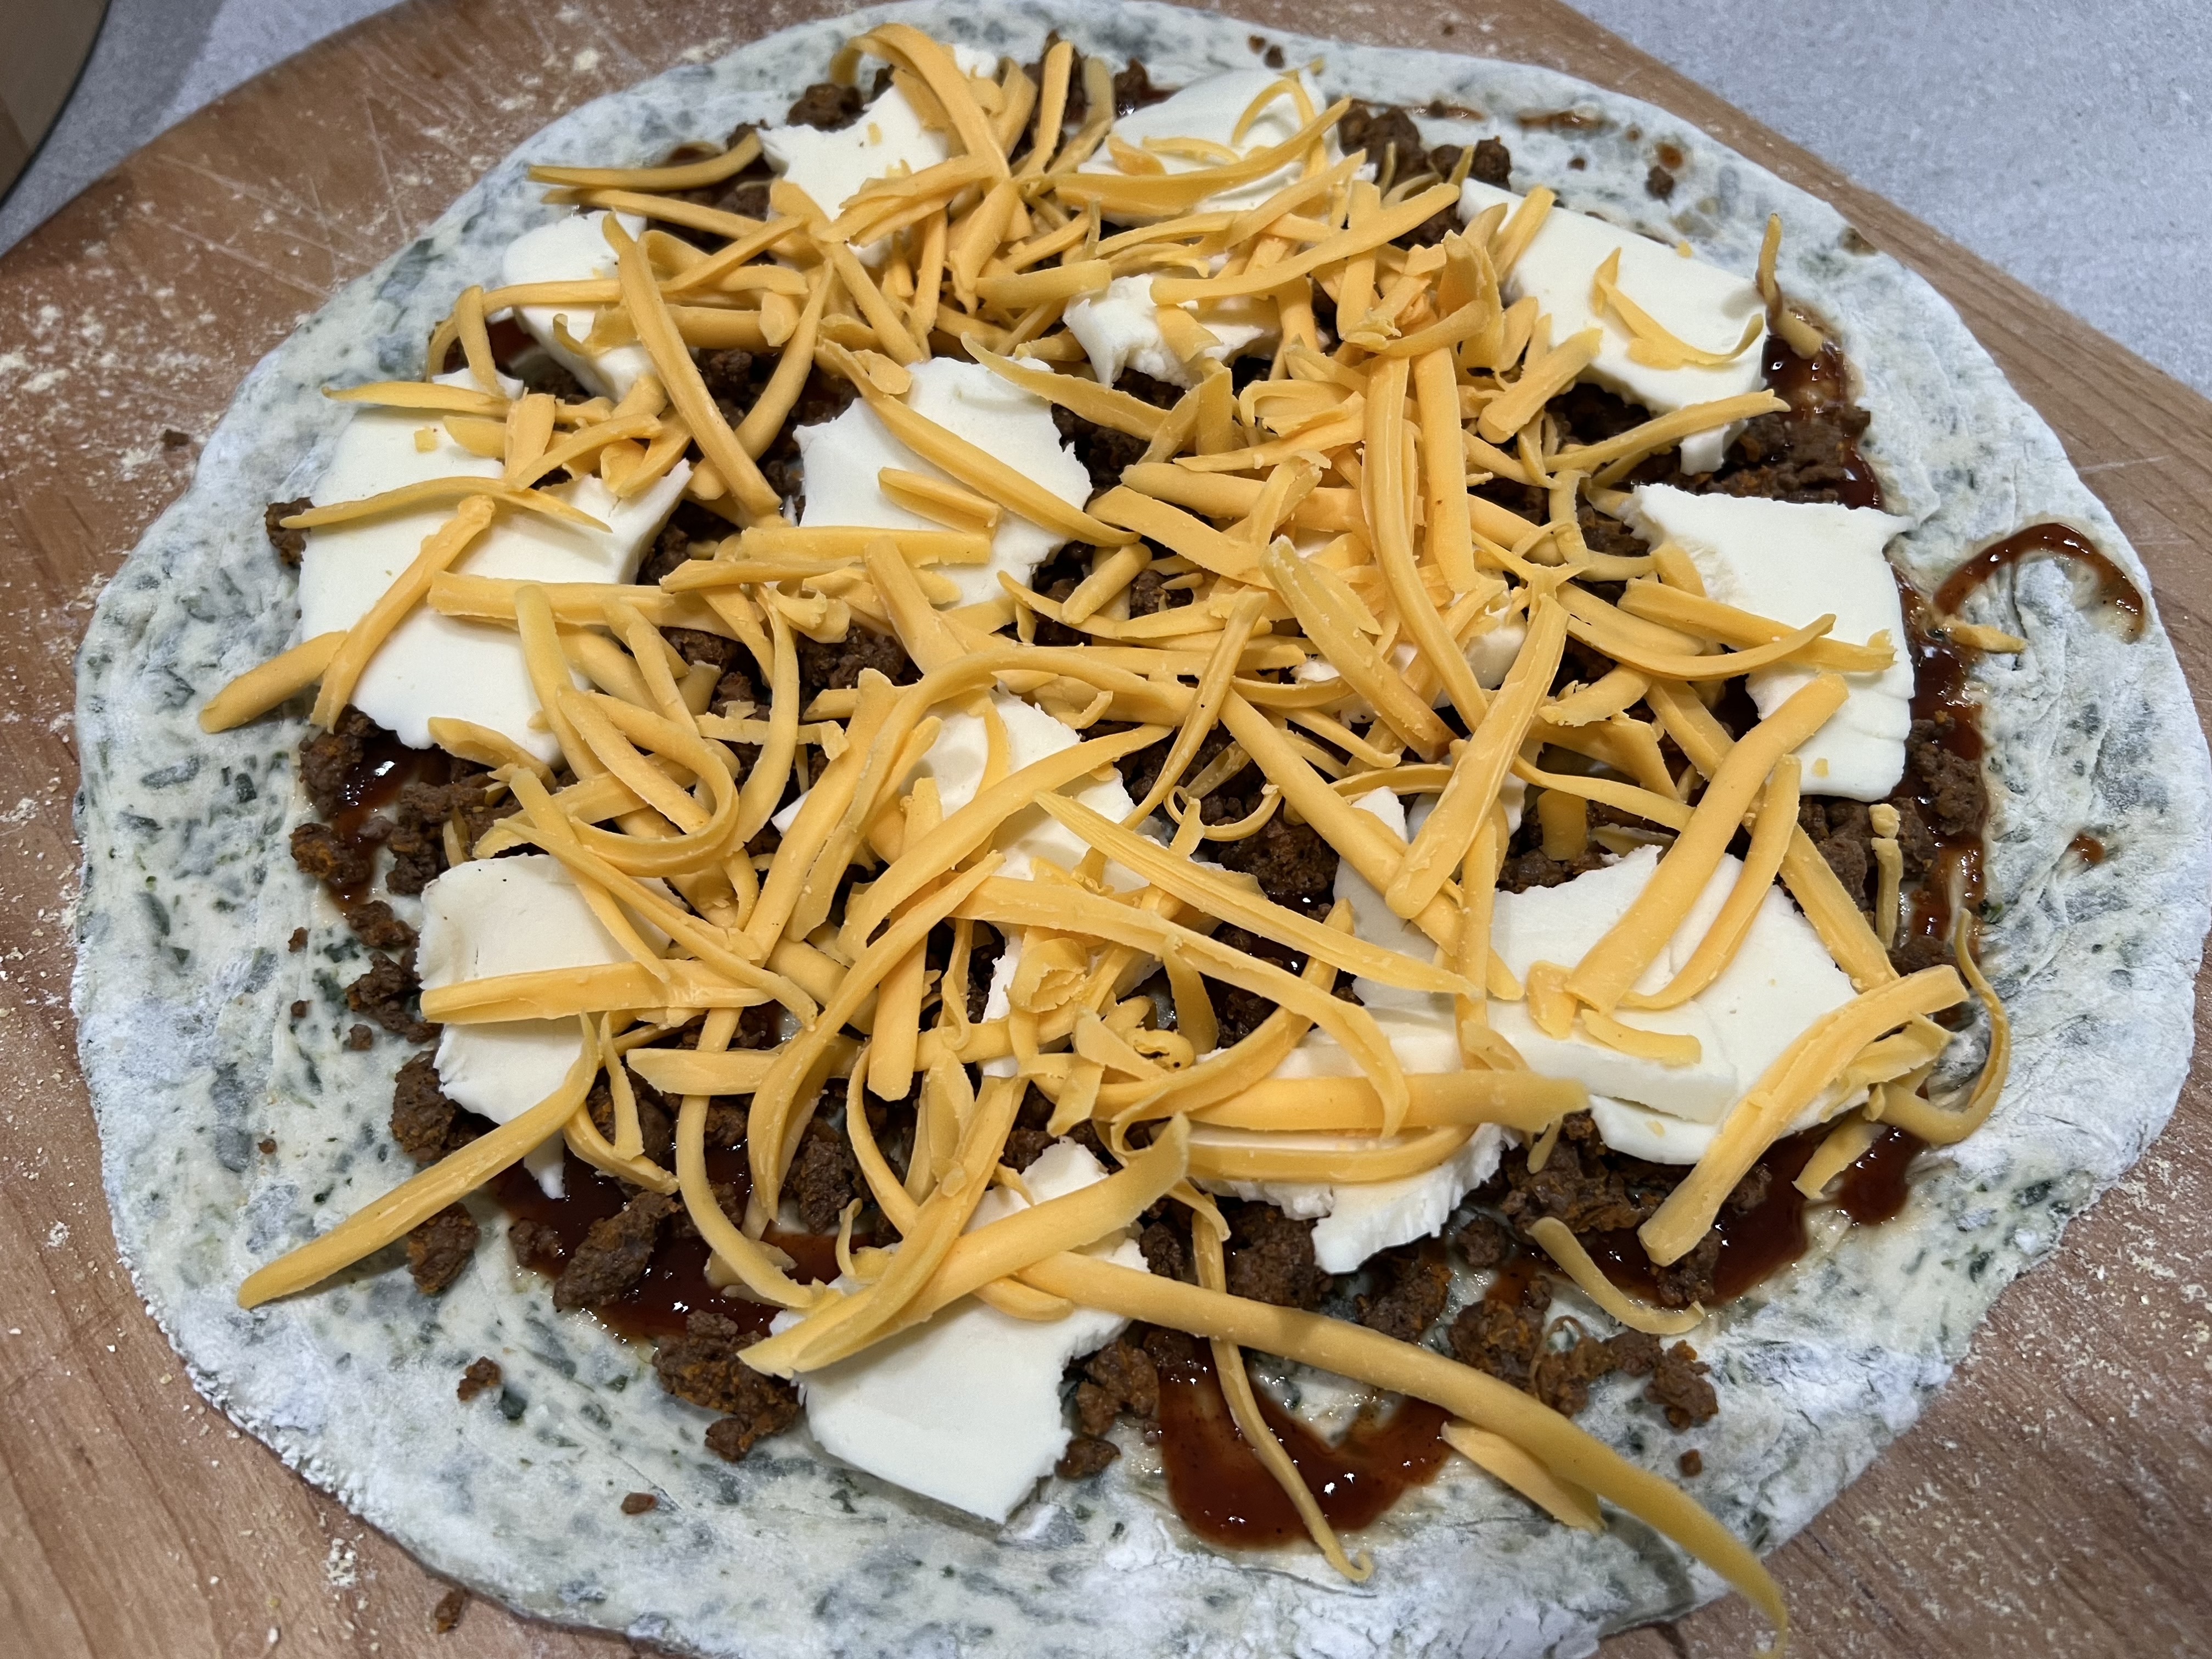
Pizza #2 utilized leftovers from previous dinners. I spread the spinach dough out on the pizza peel, and spread some barbecue sauce on it. I followed this with leftover chili meat I had made for chili dogs a couple of nights before. Then I topped the meat with a combination of mozzarella and cheddar.
Cheesy, melty and delicious!
I still had some spinach left over. So the next day, I prepared another wonderful recipe. Check in with me next time.
Brining, the process of letting a hunk of protein soak in a salt solution for a few hours, is a great way to add flavor and moisture to any cut of meat. I brine these wings for 3 hours before using a sweet and spicy rub. They can be grilled or roasted in the oven.
The brine…
1/2 cup Kosher salt
3 tablespoons light brown sugar
1 teaspoon whole black peppercorns
1 whole bay leaf
2 quarts water
Combine all ingredients in a saucepan and heat until the sugar and salt dissolve. Remove it from the heat, and let it cool to room temperature.
The rub…
1/4 cup light brown sugar
1/4 cup granulated sugar
1/4 cup sweet paprika
1 tablespoon Kosher salt
1 tablespoon granulated onion
2 teaspoons black pepper
1 teaspoon dried thyme
1 teaspoon dry mustard
1 teaspoon ground ginger
1 teaspoon cayenne pepper
Combine all the ingredients in a bowl.
Place 3 lbs. of chicken wings in a Ziploc bag and pour the cooled brine into the bag. Place the bag in a bowl to prevent leaks and keep it at room temp for 3 hours. I wouldn’t brine it longer than that, or it will get really salty.
After 3 hours, remove the chicken from the brine and dry the wings with paper towels. Discard the brine.
Place the chicken pieces in a large bowl and sprinkle them with 1/3 cup of the rub, tossing to coat the chicken well. Place the bowl with the chicken in the fridge until you’re ready to cook.
About 30 minutes before cooking, remove the bowl from the fridge and let the chicken come to room temperature.
Pre-heat the oven to 350 or light a grill.
Toss the chicken with some more of the rub, if you like, then place the pieces on a sheet pan lined with non-stick aluminum foil.
Bake at 350 for 30 minutes or until done. Lower the oven temperature if it starts to burn.
If you’re grilling, cook the wings over medium heat, turning them frequently to prevent burning. Cook until the wings are done.
I’ve bought many burger presses in my day, and I’ve found that the meat gets stuck inside them after pressing, making removal somewhat difficult. Some presses have so many parts to them, they get lost in my cabinet or jam up the dishwasher. Frankly, every one that I’ve bought over the years was a waste of money.
Chances are, somewhere in your storage area, you’ve got a wide mouth Mason jar with a metal top, composed of a flat lid and the band that goes around it and screws onto the jar top. As long as they’re not rusty, you can use them to make perfect quarter-pound burgers. If they are rusty, you can buy a half-dozen lids and bands for just a few bucks in any supermarket.
I get my burger meat in 1-lb. packs. If they’re frozen, I let them thaw wrapped. Then I cut the meat into quarters, simply eyeballing it. Each quarter-pound of meat fits quite nicely into the Mason jar top. I flip the top over and press down to compact it, then push the flat lid through the band, and out pops a perfect quarter-pound burger.
Once I’ve got all my burgers made, I place them on a small sheet pan lined with non-stick aluminum foil and keep them in the fridge until I’m ready to cook.
The lid and band go in the dishwasher, and can be used over and over.
I moved to my current home in the fall of 2020. One of the toughest things to say goodbye to in my previous garden was my asparagus patch. Over the years, I had grown loads and loads of delicious asparagus, but sadly, there was no good way to transport that patch to my new place.
I’ve got a much smaller garden space at my current home, a small ledge that gets full sun, and despite its limited size, asparagus is too important of a crop to leave out. So I bought a bunch of plants in the fall of 2020, and planted them. I got some beautiful asparagus ferns at the end of the season. The following spring, some very tiny asparagus spears made an appearance. They say you’re not supposed to harvest asparagus for at least a couple of years to let the new bed establish, but I found that pretty much impossible to do…I have to have at least a bit of a taste.
This spring, I’m hoping for a bigger crop. It still won’t be at it’s peak, but the fact that I’m already seeing asparagus spears popping through the soil of my #vedgeledge, as I call it, is very exciting!
Hoping to get bigger and better spears this season!
In the meantime, I can only look back at my previous success with asparagus…
The home garden is already showing signs of activity. Overwintered dill and arugula seeds are sprouting. And cool weather seeds that I’ve sown early: peas, turnips, radishes, and others are doing the same.
Asparagus is really easy to grow. You just need the space, and the plants practically do the rest.
Space them about a foot apart, and before you know it, you will have a vast network of tasty stalks sprouting through the soil every spring. They are so much better than anything you can buy in a supermarket.
In the start of the growing season, the stalks don’t even make it into the house. I cut them and just eat them straight out of the garden. Eventually, they make the move to the kitchen, where I love to simply place them on a baking sheet and drizzle a little olive oil over them. Salt and pepper…and then in a 400-degree oven until they’ve caramelized.
Sometimes I toss some tasty chives with blossom buds on top of the asparagus and roast.
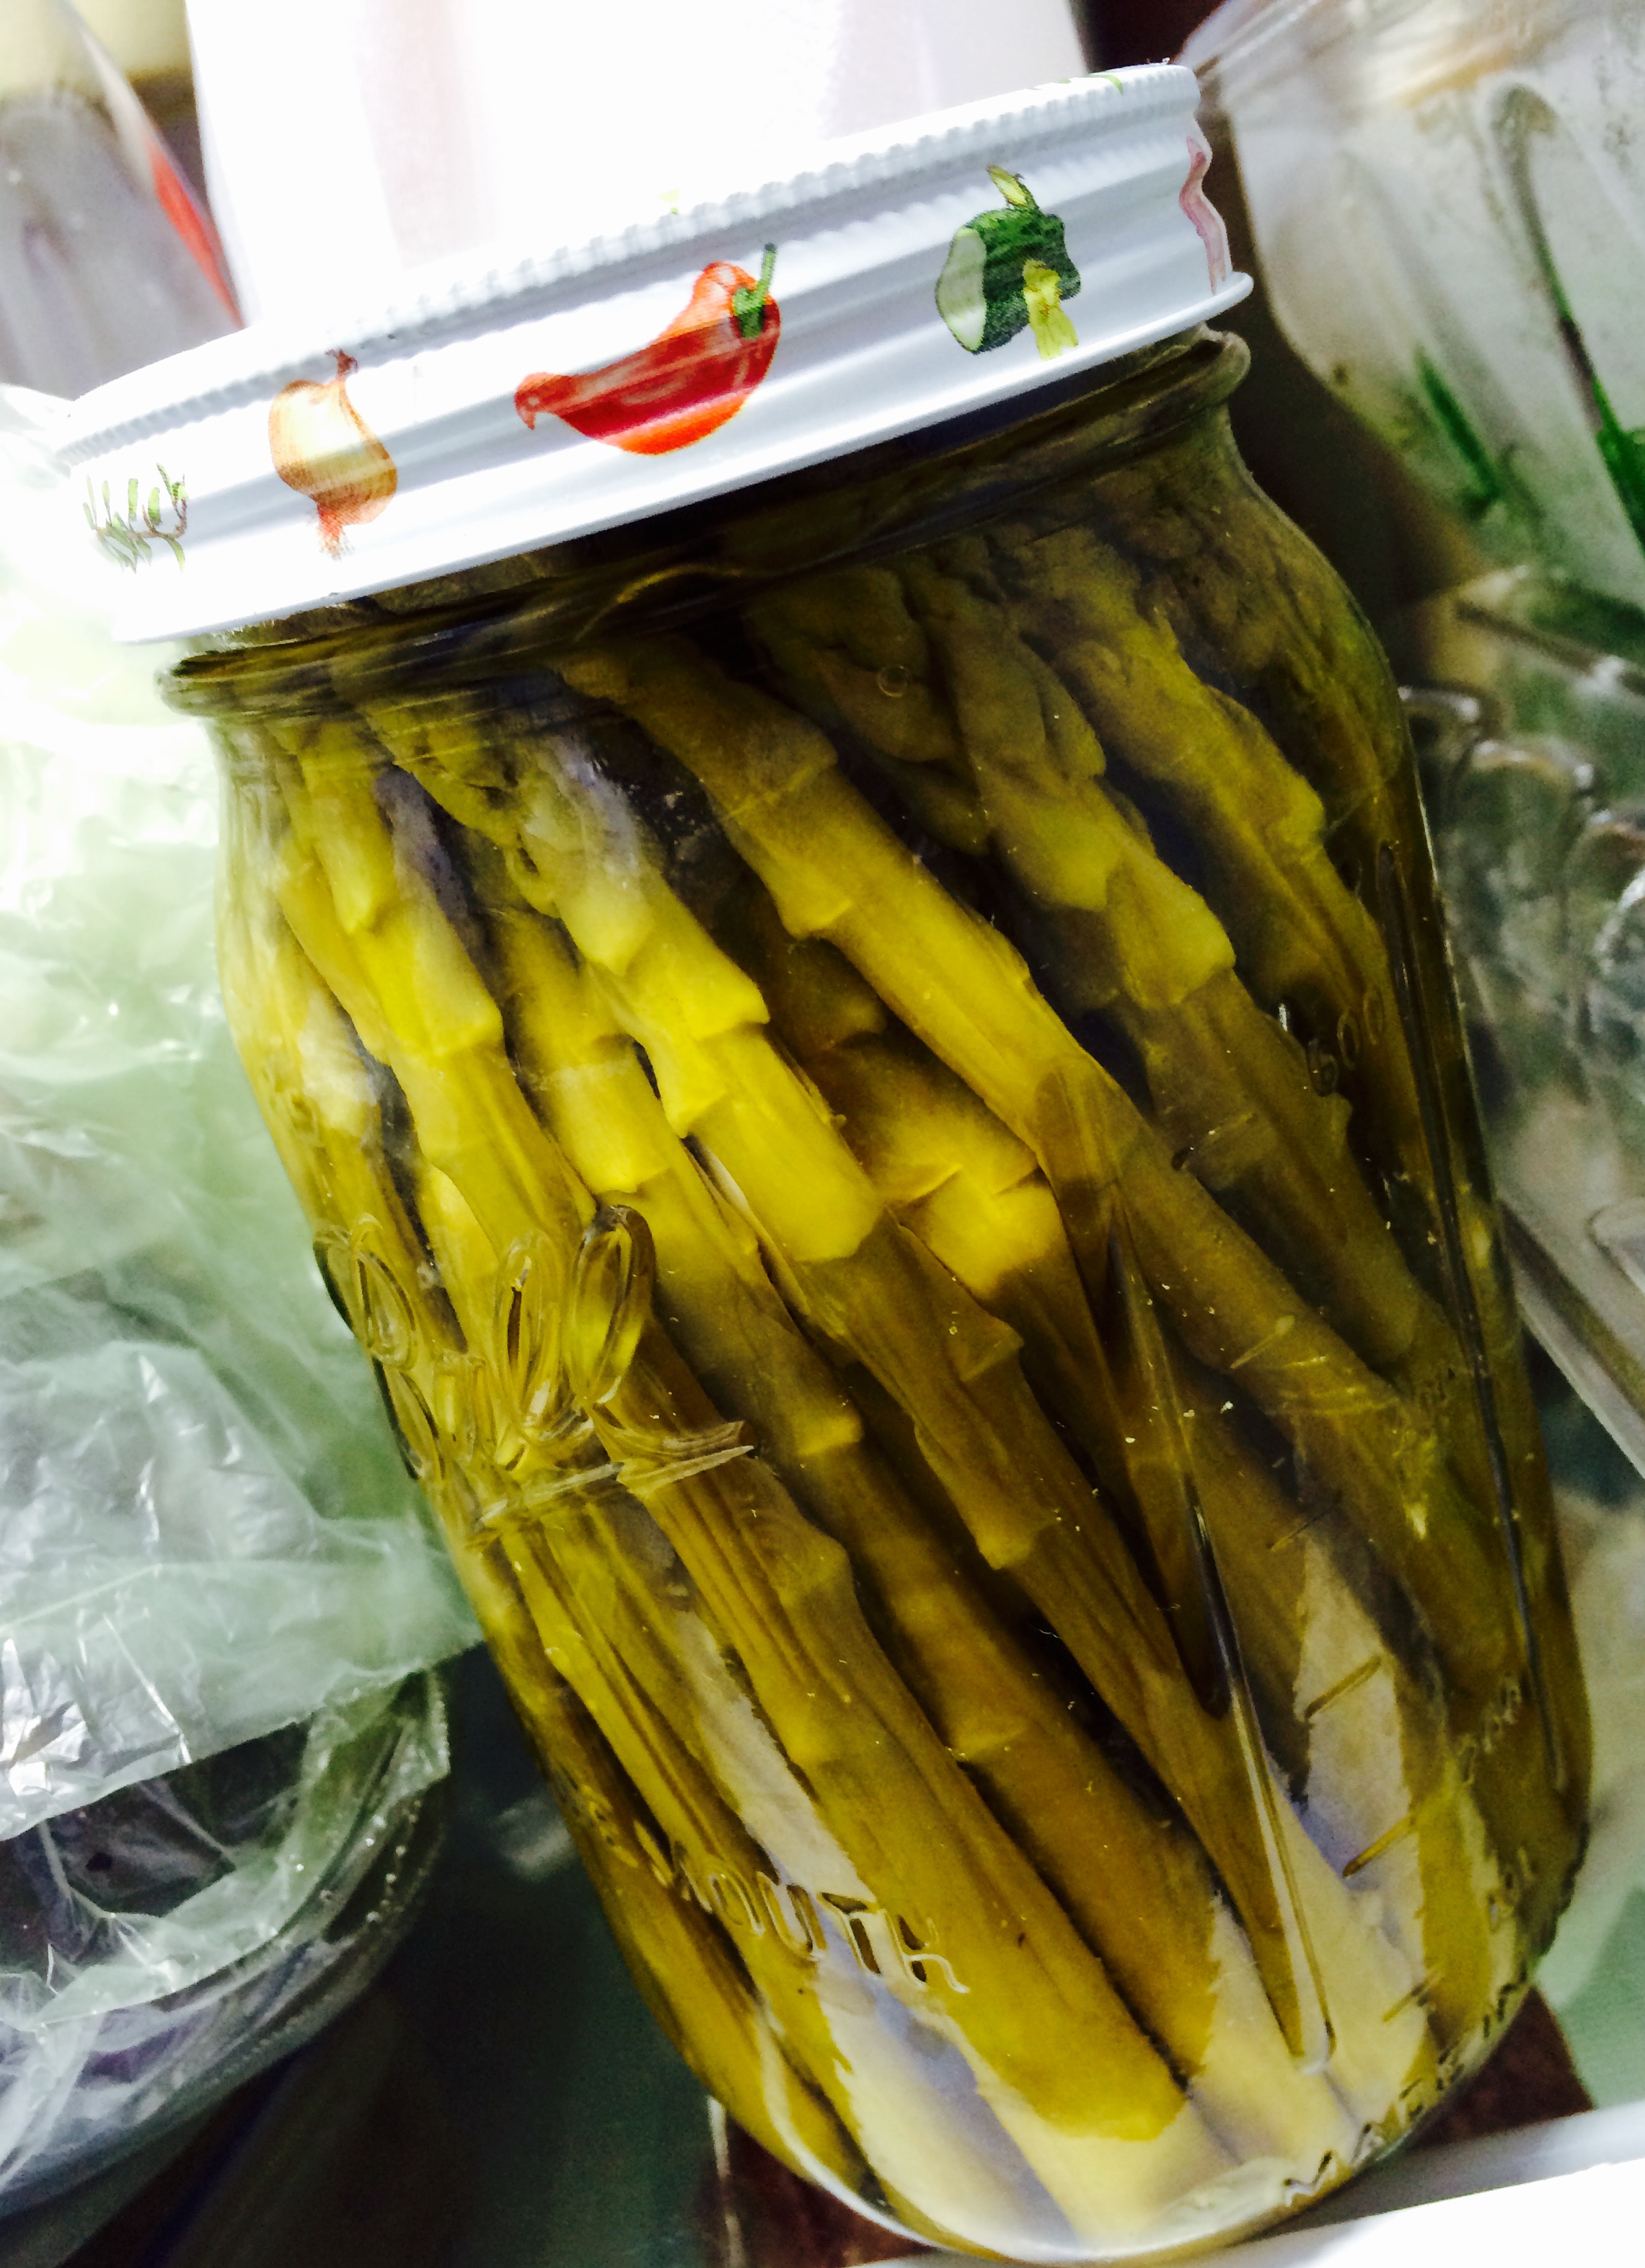
In the past, I’ve had I so much asparagus that I just didn’t know what to do with them all. So I started pickling them…a really easy process that ensured I had delicious asparagus well into the summer.
Several bunches of asparagus spears
2 cups white vinegar
1 cup cider vinegar
1 1/2 cups sugar
3 cups water
20 peppercorns
Garlic cloves, peeled
Kosher salt (1 teaspoon per quart-sized Mason jar. Use less for smaller jars.)
Bring the vinegar, water, sugar and peppercorns to a boil. Set the pan aside.
Trim the bottom of the asparagus spears so that the spears are just slightly shorter than the height of the quart-sized Mason jar you will use. Or cut them into pieces that will fit smaller jars.
Pack the jars as tightly as you can with the asparagus spears. (They will shrink when processed.) Add the garlic clove and 1 teaspoon of salt to every quart-sized Mason jar…less for smaller jars.
Fill the jars with the vinegar mixture and seal them tightly.
Process the jars for 10 minutes. Let them cool before placing them in the refrigerator. If you know you’re going to eat all the asparagus in the next week, processing isn’t really necessary.
DOES YOUR PEE SMELL FUNNY WHEN YOU EAT ASPARAGUS?
Asparagus has a sulfur-containing compound identified by scientists as methyl mercaptan. A colorless gas, this compound is also found in blood, feces, garlic, eggs, cheese and even skunk secretions. Another ingredient found in asparagus is asparagine. Present in foods like dairy products, seafood, poultry, fish and nuts, this amino acid is known to have a distinctive smell when heated. To metabolize both methyl mercaptan and asparagine, your body needs to break these compounds down and it’s this breakdown that’s responsible for your urine’s strange smell.
Since both methyl mercaptan and asparagine are associated with the sense of smell, there is debate over which ingredient is actually responsible for the asparagus-urine phenomenon. It could be one, or both.
Many people claim that, regardless of asparagus consumption, their urine does not smell. There are multiple theories about that as well. The first claims that everyone’s urine is in fact affected by asparagus, but only about half of the population have the specific gene that is required to smell the change. On the other hand, the second theory states that only half of the world’s population has the gene that’s required to break down the compounds found in asparagus and, if the body doesn’t break them down, no smell is emitted. In fact, one study published in the British Journal of Clinical Pharmacology found that only 46 percent of British people tested produced the odor while 100 percent of French people tested did. So whatever the reason, asparagus will forever be known as the vegetable that makes your urine smell strange.
I’ve never met a ceviche I didn’t like. Sometimes, nothing can stop a serious seafood craving like sushi, sashimi or ceviche. They require the freshest seafood and veggies you can get your hands on. And other than some fine chopping, they require little else.
The acid in citrus juices basically “cooks” the seafood in a process very similar to applying heat, but when I use shrimp in ceviche, I place them in some boiling salted water first…although very briefly.
This recipe is a great appetizer for you and your guests.
Crazy colored shrimp, thanks to blood oranges.
For the poaching liquid…
2 quarts water
1/4 cup salt
For the ceviche…
1 pound raw wild-caught American shrimp, peeled and deveined
juice of 2 lemons
juice of 2 limes
juice of 2 oranges (I had blood oranges this time)
1 cup diced seeded peeled cucumber
1/2 cup finely chopped red onion
pinch of red pepper flakes
1 cup diced seeded tomato
1 avocado, chopped into 1/2″ cubes
1 tablespoon roughly chopped cilantro leaves, plus more for garnish
1/4 cup extra virgin olive oil
1/4 teaspoon Fleur de Sel
Combine the water and 1/4 cup salt in a saucepan and bring it to a boil. Add the shrimp and immediately turn off the heat. Let the shrimp sit for just a minute, then drain and transfer them to a bowl of ice and place them in the fridge to cool.
Remove the cooled shrimp from the fridge and drain the water, and get rid of the ice. Chop the shrimp into 1/2″ pieces and place them in a medium non-reactive bowl. Add the lemon, lime and orange juice. Stir in the cucumber, onion and pepper flakes. Refrigerate this for an hour.
Stir in the tomato, avocado, chopped cilantro, olive oil and Fleur de Sel into the shrimp mixture. Let it stand at room temperature for 30 minutes before serving. Garnish with cilantro leaves, if desired.
What we Americans think of as fast food is not what, say, the Italians think of as fast food. We think of drive-thru burger joints serving greasy, salty and fatty food. The Italians think fast food is something that simply doesn’t take all day to cook! If you can use the freshest of ingredients, and serve it in the time it takes to sip a half a bottle of wine while chatting with a friend, it’s fast food Italian-style.
Years ago, we visited the island of Capri in Italy, and one of the dishes we enjoyed was an incredibly simple pasta and tomato dish called spaghetti sciue-sciue (pronounced “shwee-shwee.”) We were told that sciue-sciue was loosely translated as “quick-quick,” although a check on the web said that it also translates to “improvisation” in Italian. And though quick it was (that is, by Italian standards), it was one of the most memorable dishes we had on our trip. It could be because of our surroundings: the famous Faraglioni rocks all around us at a small seaside restaurant called DaLuigi ai Faraglioni. We took the small shuttle boat from Marina Piccola, which made its way through those stacks jutting out of the Bay of Naples, and landed at this historic restaurant, built in 1936. People come here not only to dine, but to spend the day sunbathing and swimming.
So the reason Da Luigi’s sciue-sciue was so amazing certainly was, in part, the location…but it was also very much due to the use of the freshest and best possible ingredients…and they didn’t mess around with them too much.
The best time to make this dish is when tomatoes are at their absolute best in your area. But if you can get your hands on some beautiful cherry tomatoes off-season (they seem to be tastier than larger tomatoes in the winter months), it’s worth having a go at it as well.
1 small can (6 oz.) tomato paste
½ cup extra virgin olive oil
2 hot Italian dried peppers, finely chopped
¼ cup white wine
8 to 10 chopped plum or cherry tomatoes (as ripe as possible)
12 to 15 torn fresh basil leaves
½ stick (4 oz.) unsalted butter
1 ball of fresh mozzarella (about 12 oz.)
1 lb. of spaghetti, or better yet, bucatini
Sea salt
Fleur de Sel (optional)
Heat a large pot of salted water to a boil and toss the pasta in.
“Heavily caramelize”–but don’t burn–the tomato paste in a large pan with the olive oil, salt, and the dried peppers. Add the white wine to deglaze, and simmer until it’s reduced by half.
Add the chopped tomatoes and simmer on medium heat until they start to break apart. Hand tear the mozzarella ball into shreds and add it to the sauce, stirring gently. Add the basil.
Add the butter, gently stirring until it melts.
When the pasta is slightly firmer than al dente, drain it and add it to the pan with the sauce, stirring gently.
Serve this dish immediately, finishing with a little Fleur de Sel.
It’s so easy to make your own mustard. And really good mustard. Mustard that hasn’t been sitting on the store shelf for a year. Mustard with real flavor.
Once the mustard is made, you’re supposed to wait a few weeks before using, letting its heat mellow a bit. But I enjoy it right from the start. Feel the burn!
The great thing about this recipe is that you make it with your favorite beer, so use what you drink and you’ll have a mustard like no one else. I used Samuel Adams Boston Ale for this recipe.
1/4 cup yellow mustard seeds
1/4 cup brown mustard seeds
3/4 cup Sam Adams Boston Ale
1/4 cup apple cider vinegar
2 tbsp. honey
2 tbsp. brown sugar, firmly packed
2 garlc cloves, smashed
1 bay leaf
2 tsp. sea salt
1/8 tsp. freshly ground pepper
Put the yellow and brown mustard seeds in a bowl and pour in 1/2 cup of the beer. Push the mustard seeds down to submerge them in the beer. (I lay a sheet of plastic wrap down on top to keep them submerged.) Cover and refrigerate them for 24 hours.
Combine the remaining 1/4 cup of beer, the vinegar, honey, brown sugar, garlic, bay leaf, salt and pepper in a small saucepan. Bring the mixture to a boil over medium-high heat, stirring to dissolve the honey and the sugar. Boil for 1 minute, the immediately remove the pan from the heat and let it cool to room temperature.
Toss the garlic and the bay leaf in the trash and pour the liquid into a blender.
Pour off any remaining beer left in the bowl with the mustard seeds. Add 3/4’s of the plumped mustard seeds to the blender and blend them to break the seeds. Add the remaining 1/4 of the mustard seeds and pulse just once to mix. You want the mustard thick, with some whole seeds remaining.
Put the mustard in an airtight container in the fridge for at least 3 days and up to a week, depending on how mellow you want it and how much waiting you can tolerate! After about 3 weeks, the mustard will be at its peak…but it will keep in the fridge for several months. (I can’t imagine it will last that long.)